Sandswept Isles
From Guild Wars 2 Wiki
Jump to navigationJump to search
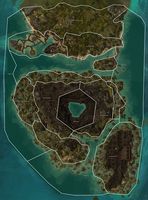
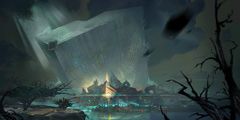
Sandswept Isles is a zone available via Living World Season 4 episode A Bug in the System. They are a series of islands on the southern end of Dajkah. The northern island is inhabited by the Olmakhan tribe of charr, while the southern island houses the gargantuan Inquest facility, Rata Primus.
Getting there[edit]
- The Living World Season 4 episode A Bug in the System is required to access this zone.
- Complete the Story mission A Kindness Repaid from Living World Season 4, episode 2: A Bug in the System.
- Using Sandswept Isles Portal Scroll.
- Using Teleport to Friend on a party member in the zone, if the Living World episode has been unlocked.
- Using the view destinations within the continent of Elona in Portal to Tyria within Thousand Seas Pavilion.
Map completion[edit]
- 8,001
- Volatile Magic (100)
- Difluorite Crystal (5)
- 1 piece of gear of Rare or higher rarity from the Elonian drop tables.
- One of the following:
- Transmutation Charge
- Black Lion Chest Key (rare chance)
Locations[edit]
| Area | Effective level |
Area objectives |
|---|---|---|
| Atholma | 80 |
|
| The Hunting Grounds | 80 | |
| The Ruined Paths | 80 | |
| Calon Islet | 80 | |
| Tyrulu Sea | 80 |
|
| Strait of Panube | 80 | |
| Northern Complex Coves | 80 | |
| Western Complex | 80 | |
| Eastern Complex | 80 | |
| Rata Primus | 80 | |
| Reserve Generator Site | 80 |
|
| Griffonstone Buttresses | 80 |
|
| Damos Isle | 80 | |
| Invariant Enclave | 80 | |
| Sargol Sea | 80 |
|
| Chukara Sea | 80 |
|
Interactive map[edit]
Events[edit]
- Meta events
- Gathering Storms
- Defeat the rampaging elementals! (80)
- [Group Event] Destroy the stormcaller echoes (80)
- [Group Event] Help Elder Rhona track down the source of the storm (80)
- [Group Event] Defeat Zohaqan (80)
- [Group Event] Help Elder Rhona track down the source of the storm (80)
- [Group Event] Destroy the stormcaller echoes (80)
- Defeat the rampaging elementals! (80)
- The Specimen Chamber
- [Group Event] Hold out until the laser array runs out of emergency power (80)
- [Group Event] Defeat the Simulacrum of Beyn, Scion of Thorns (80)
- [Group Event] Defeat the Simulacrum of Destroyer Crematus (80)
- [Group Event] Defeat the Simulacrum of Jord Ironfrost (80)
- [Group Event] Defeat the Simulacrum of Subject Beta (80)
- [Group Event] Defeat the Simulacrum of Tlati, the Unchained (80)
- [Group Event] Defeat the Simulacrum of Varkesh, the Branded (80)
- [Group Event] Defeat the dragon minion simulacrum (80)
- [Group Event] Hold out until the laser array runs out of emergency power (80)
- [Group Event] Defeat the champion bounty (Champion Crystalwing) (80)
- [Group Event] Defeat the champion bounty (Champion Emogg the Soulbeast) (80)
- [Group Event] Defeat the champion bounty (Champion Exterminator IG-04) (80)
- [Group Event] Defeat the champion bounty (Champion Ironshell) (80)
- [Group Event] Defeat the champion bounty (Champion Magneton Manipulator) (80)
- [Group Event] Defeat the champion bounty (Champion Nepheretes) (80)
- [Group Event] Defeat the champion bounty (Champion Oakenscorn) (80)
- [Group Event] Defeat the champion bounty (Champion Old Stonehoof) (80)
- [Group Event] Defeat the champion bounty (Champion Vebis the Inquisitor) (80)
- [Group Event] Defeat the champion bounty (The Prickly Pair) (80)
- [Group Event] Defeat the Legendary bounty (Legendary Seneb the Desecrated) (80)
- [Group Event] Defeat the Legendary bounty (Legendary Starcaller) (80)
- Other events
- [Group Event] Ambush! Defend yourselves against the Awakened! (80)
- Catch as many fish as you can! (80)
- [Group Event] Defeat Dominus Crystallum! (80)
- Defeat the Inquest patrol! (80)
- [Group Event] Destroy the Mark III Suppressor Golem (80)
- Disable the Inquest security turrets (80)
- Disrupt the Awakened patrol (80)
- Free Subject S by destroying the shield generators (80)
- Mount up and help Fenn wrangle the panicked marmoxes! (80)
- Escort Fenn back to the village (80)
- [Group Event] Defend livestock from the beetle stampede (80)
- [Group Event] Defeat Abiri, the Beetle Queen (80)
- [Group Event] Defend livestock from the beetle stampede (80)
- Escort Fenn back to the village (80)
- Overload the Inquest generator with golem cores (80)
- Participate in the celebration dance! (80)
- Participate in the daily motion vision assessment (80)
- Sign up for the mounted race (80)
- Sign up for the skimmer race (80)
- [Group Event] Stop the flow of Inquest data to thwart their operation (80)
Crafting resources[edit]
- Resource nodes
- Difluorite Crystals
- Mithril Ore
- 2 Orichalcum Ore
- 1 Rich Mithril Vein
- 1 Rich Orichalcum Vein
- 1 Ancient Sapling
- Baoba Sapling
- Eerie Driftwood
- Artichoke
- Cabbage
- Cluster of Desert Herbs
- Coral
- Desert Vegetables
- Flax
- Lentils
- Mussels
- Passiflora
- Recipes
 Recipe: Bowl of Poultry Satay from Malor at The Ruined Paths
 Recipe: Plate of Beef Rendang from Malor at The Ruined Paths
 Recipe: Avocado Smoothie from Malor at The Ruined Paths
Related achievements[edit]
- Primary article: A Bug in the System (achievements)
Notes[edit]
- On any given map, there are 7 orichalcum nodes, 2 rich mithril veins, 2 rich orichalcum veins, and 2 ancient saplings that spawn on the North island, and 9 orichalcum nodes, 1 rich mithril vein, 2 rich orichalcum nodes, and 3 ancient saplings that spawn on the South island. However, across the whole map, only 2 orichalcum nodes, 1 rich mithril vein, 1 rich orichalcum vein, and 1 ancient sapling can be harvested per day.
Trivia[edit]
- While riding a skimmer through the ocean surrounding the Sandswept Isles, a group of three or four dolphins can join the player and jump out of the water near them, giving the player swiftness. Similarly, there's a also a chance that a shark will lunge at the player, stunning and dismounting them.


