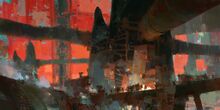
Molten Furnace
Molten Furnace
- Year
- 1326 AE
- Storyline
- Living World Season 1
- Chapter
- Flame and Frost
- Location
- Molten Weapons Facility
(Molten Facility) - Level
- 80
- Preceded by
- Alliance Investigation
- Followed by
- A Quiet Celebration
- API
- 641
|
Molten Furnace loading screen |
Molten Furnace is the fourth story step of Flame and Frost, the first episode of Living World Season 1.
Objectives[edit]
- Read the letter from Braham.
- Infiltrate the Molten Alliance base.
- Head to the Molten Alliance weapon facility.
- Strategize with Rox and Braham.
- Fend off the ambush.
- Follow the drill with Rox and Braham.
- Push forward into the base.
- Proceed through the Molten Alliance base.
- Survive the weapons-testing barrage and put a stop to the experiment.
- Travel deeper into the Molten Alliance base.
- Head deeper into the weapons-testing facility.
- Free the prisoners.
- Find an escape route.
- Find an escape route from the base.
- Investigate the facility's core.
- Radion the Vile

- Gigarg the Cruel

- Set up charges on the furnace's core.
- Speak to Braham and let him know the explosives are set.
- Escape the facility!
Rewards[edit]
Walkthrough[edit]
- Following the drill
Initially, ignore the drill and clear out the small group of creatures that attempt to ambush you. You can optionally mine the ore to progress the Ready Ore Not achievement. Then follow Rox's drill as it reveals side-rooms with Ooze, Bats, and Earth Elementals. At the far end of the tunnel, there are a group of Flame Elementals. If you then follow the right-hand wall around, you can backtrack along the northern side of the tunnel to two further ore nodes - this tunnel features spiders.
Returning to the main path, curtains of hot steam periodically appear to block the corridor. Wait for them to disappear before stepping across each of them. You will then find yourself in a large cavern looking down onto a caged arena. Cross the cavern and enter the arena.
- Weapons test
The core in the middle of the room needs to be destroyed. It will become vulnerable at certain phases during the fight, at which point reducing its health to the next 25% threshold will remove all enemies from the arena. Some of the phases will have Veteran Molten Dredge appear around the arena; prioritise Molten Protectors as they can prevent the core from taking damage. The phases are:
- Phase 1 (100-75%): Fireball Barrage - ranged attacks, marked with circles on the ground. Walk and dodge to an area of the arena without fireballs.
- Phase 2 (75-50%): Ground Pound Shockwaves - big blocks thump down in each corner of the arena, creating a shockwave that can be jumped over. Jump over the shockwaves.
- Phase 3 (50-25%): Fire Tornadoes - initially small flames appear along one wall of the arena, and then they speed up out of the wall in a straight line across the arena. Either step between the tornadoes, or position yourself behind the core in the middle of the room with respect to the direction the tornadoes are travelling from.
- Phase 4 (25-0%): All three effects at once - do your best to avoid them.
At 0%, Kostya appears within the arena for a short time; he's level 1 and instantly dies when attacked.
- Coolant corridor
Destroy the coolant pumps throughout the corridor. At the end of the corridor is a Veteran Molten Effigy, which is reinforced by the appearance of a Veteran Molten Gunner and Veteran Molten Brawler during the fight. Breaking the last of the coolant pumps opens the gate. The page "Rodion's Blood Transfusion Results" is on the ground nearby to the veteran.
- Prisoners
Emerging from the coolant pump area, you find yourself on a platform high above a large open area. To your left there are some Molten Dredge guarding a prisoner. Kill the dredge and free the prisoner. You can optionally collect the first Molten Memorial item in the hanging cage. Head south through the now-open gates (which opened when you freed the prisoner), optionally collecting the "Bloodied Journal Entry" tucked away on the right.
Follow the path downwards, clearing the Molten groups on the way to release further prisoners.
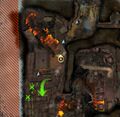
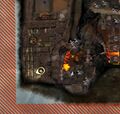
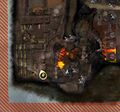
In the final prisoner room there are a series of rock crushers at the back. The bridge leading to this room has a body beneath the end of it, with the "Crude Drawing". After freeing all of the prisoners, the gate opens at the far end. There will be a big green arrow on the mini-map pointing up a small ramp. To the west of the small ramp, backtrack to find a "Torn Letter".
The journal entry "Gigarg's Armor" is on a workbench after rounding the corner after the gate. Pass through the next corridor with vertical steam jets - the next little room has three optional objects that can be interacted with to turn off the steam pipes. Approaching the eastern end of the platform triggers dialogue from Rox, then the next gate opens. Follow the ramp down to the circular arena.
- Molten Duo
Stepping into the circular arena triggers a cinematic featuring two champions Gigarg the Cruel (the firestorm) and Rodion the Vile (the berserker). They both attack. Killing either of them triggers the start of shockwaves around the outer edge of the arena, which you'll have to cope with when fighting the second champion.
- Explosives
After defeating the two champions, head up the ramp east of the arena, and pick up some of the marked explosives. Carry them to the three marked points, and plant them with the interaction dialogue. Return to Braham and Rox (who has opened the exit door). A 30 second timer starts and appears in red text on the screen. The last Mithril Ore node is within this corridor, grab it on the way past.
Reaching the end triggers the Rage Against the War Machine achievement, and also the Molten Furnace achievement after accepting the mission rewards.
Achievements[edit]
| Molten Furnace | Flame and Frost | 1 |
|---|---|---|
| Complete the story chapter Molten Furnace. | Completed Molten Furnace | 1 |
- Accept the story episode reward after reaching the end of the facility.
| Rage Against the War Machine | Flame and Frost | 10 |
|---|---|---|
| Destroy the Molten Alliance weapons facility in Diessa Plateau. | Molten Facility Destroyed | 10 |
- Reach the end of the facility.
| Investigative Study 1 | Flame and Frost | 1 |
|---|---|---|
| During the Flame and Frost storyline, find and read sources of information on the Molten Alliance. |
Lore Located | 1 |
- Torn Page from Kostya's Lab Journal: After completing the weapon test and defeating Kostya, on the workbench in the corner to the left of the gate (west side of map).
- Rodion's Blood Transfusion Results: Near the Veteran Molten Effigy (southwest area of the map).
- Bloodied Journal Entry: After rescuing the first prisoner, go back to the room's entrance and through the previously closed gate. Look on the ground in the last nook on your right, right before the ramp down.
- Gigarg's Armor: On the workbench in the corner to your left after the last prisoner and crushers (central area of the map).
| Molten Memorial | Flame and Frost | 5 |
|---|---|---|
Find hidden keepsakes from the fallen in the Molten Furnace and return them to friends and relatives.
|
Recovered and Delivered 6 of 6 Mementos | 5 |
- There are three items to collect during the dungeon.
- Refer to the guide on Molten Memorial:
- Crumpled Pages is in the hanging cage to the right of the first prisoner. Jump to the open door.
- Crude Drawing under the walkway gratings, at the end of the ramp with the molten lava waterfall that leads to the room with the rock crushers. Turn right at the very bottom of the ramp and follow the ledge around.
- Torn Letter on the west side of the exit ramp after the room with the rock crushers.
| Ready Ore Not | Flame and Frost | 5 |
|---|---|---|
| In the Molten Furnace story instance, find all of the hidden mining nodes. |
Discovered 1 Hidden Mining Node | 1 |
| Discovered 8 Hidden Mining Nodes | 1 | |
| Discovered 16 Hidden Mining Nodes | 3 |
- 1x ore node is found in the entry area prior to starting the drill.
- 7x ore nodes are found in the drill tunnel and just before the steam curtain
- 2x of these are accessible only after the drill has completed tunneling, by wrapping around to the right into a spider cave
- 1x ore node found in the steam curtain area after the drill tunnel
- 2x ore nodes found in the chasm prior to the weapons test area
- 1x ore node found behind the weapons test area
- 3x ore nodes are found in the tunnels while rescuing prisoners (The last of these among the rock crushers).
- 1x ore node is found while leaving the area after defeating the molten duo (During the timed escape portion).
NPCs[edit]
Open world[edit]
In the Molten Facility[edit]
Allies[edit]
- Various
Services[edit]
Foes[edit]
- Molten Axe Fiend
- Molten Bladestorm
- Molten Blademaster
- Molten Fire Shaman
- Molten Igniter
- Molten Stalker
- Molten Shadowblade
- Molten Smoke Shaman
- Rodion the Vile
- Veteran Molten Brawler
- Veteran Molten Gunner
- Gigarg the Cruel
- Lead Scientist Kostya
- Molten Disaggregator
- Molten Excavator
- Molten Mining Suit
- Molten Oscillator
- Molten Ratnik
- Molten Reverberant
- Molten Resonator
- Veteran Molten Protector
- Veteran Molten Shaman
Objects[edit]
- Bloodied Journal Entry
- Coolant Box
- Facility Escape Lever
- Faulty Gate
- Gigarg's Armor
- Molten Device
- Molten Explosives
- Outflow Vent
- Pile of Scraps
- Rodion's Blood Transfusion Results
- Steam Pipe Controls
- Thermal Core
- Torn Page from Kostya's Lab Journal
- Workbench
Crafting resources[edit]
- Resource nodes
- Mithril Ore
- Orichalcum Ore
Dialogue[edit]
Open world[edit]
Braham Eirsson Our Time Has Come <Character name>, I've been talking with the Vigil about the attack on Cragstead. They agreed that I could join the raid on the Molten Alliance, and now's the time! The Vigil's making surprise attacks against as many of the Molten Alliance's weapon facilities as possible to rescue prisoners and crush the invasion. And they need help. Join us! I'd be honored to fight by your side once more. Return to Wayfarer Foothills or Diessa Plateau and watch for any indication that they've found an entrance. Bring friends, lots o fthem! I'll be there, ready to bust some Molten heads. And by Wolf, I'm looking forward to it. Your friend, Braham |
Speaking to Warmaster Uma Threshgrowl at Diessa Plateau:
- Warmaster Uma Threshgrowl: We got word you might join the fight, Commander. The Order's infiltrator got us the keys for this drill, and we're going to take it straight to Molten Alliance central.
- Anyone else there?
- A squad of Vigil operatives. Oh, and a young male norn and a female charr, but they aren't affiliated with my team. They're determined to get in, though.
- So Rox and Braham made it. Good.
- Allies of yours? Well, if you trust in their abilities, then so does the Vigil. Good luck in there.
- Thanks. See you around.
- All right. Thanks.
- I know what I'm doing.
Molten Furnace[edit]
Speaking to the Vigil at the entrance to the facility:
- Aebolla Gloomstride: You're right on time, Commander. This looks to be the big one.
- (if Order of Whispers)
- We're fighting the unfightable. You must be Agent Brandubh's partner.
- Just solving the unsolvable. I take it you helped him out, then... I got what I could out through the cracks in security. Now's the time for it to pay off.
- Do you have any information on what we're up against? (same as below)
- Carry on, Agent.
- (otherwise)
- Do you have any information on what we're up against?
- I'd been infiltrating the Molten Alliance for weeks before things lined up for this operation. We're just outside their main facility—new weapons, mining, and...experiments on the captives.
- All right, get some rest. I'm headed in to put an end to this.
- Don't worry, I'm on point.
- Vigil Crusader: Something isn't right... it's too quiet. The Molten Alliance is up to something.
- I'll watch my step.
Approaching Rox and Braham:
- Rox: I don't like the look of this. One well-placed charge could bring it all down on our heads. We could be buried in here.
- Braham: Got no choice, Those dredge are keeping prisoners. Some are friends of mine.
- Rox: Okay. I just hope that dredge and the Flame Legion build this place for the long run.
- Alternatively:
- Rox: We should wait for the others. Name's Rox. You?
- Braham: Braham. I'm no good at waiting. Not when I have friends in trouble. Dredge took them prisoner. I'm here to get them out.
- Rox: I get it. Flame Legion took mine. But don't worry, we'll go at exactly the right time. Our destinies dictate our every move. You'll see.
Speaking to them:
- Braham: We need to get moving. Who know how long they'll keep the prisoners alive. Got tell that charr we're ready to go.
- On it.
- Rox: No time to lose. Plus, this place gives me the creeps. I don't like being underground, it's too...dark. It's stifling.
Are you and that hotheaded norn ready? I want to move. - We're ready! Let's go.
- Hold on. We're not quite ready.
Starting the drill:
- Rox: It's time. I'm going to go check out that drill over there, see if I can get it started. The caverns must be behind this wall.
- Braham: Why don't we just kuh-bam our way through?
- Rox: You get points for enthusiasm, cub, but that'll take forever. I know about these machines. Let me work some miner magic. Follow me.
- Vigil Tactician: It's an ambush!
- Braham: We can handle them! Spread out!
- Molten Brawler: You will die in flames.
After defeating the ambush:
- Rox: Got it! Okay, don't follow too close. These things can spit hot rocks! Here we go!
In the tunnel (Occasionally when a pocket has been opened):
- Braham: Watch out! We've hit a pocket of... What is that?
- Braham: Oh, ew. Is that thing normal?
- Braham: This must be a lair.
- Rox: Knock, knock! Exterminator's here.
- Rox: Local wildlife! Heads up.
- Rox: Stay alert. These underground creatures can be cunning.
Speaking to your allies in the tunnel section:
- Rox: I hate tunnels. They're so... dark. I'll try not to shoot you in the back of the head by accident.
- I would appreciate it if you didn't.
- Braham: This is...eerie. I prefer climbing mountains, not crawling underneath them.
- Right there with you.
At the steam jet tunnel:
- Rox: Ow! Rawr!
- Rox: C'mon, Frostbite. Let's go.
- Braham: Hurry!
- Rox: Ignore the pain! Move!
Leaving the steam jet tunnel (in-game cutscene):
- Braham: Uh-oh. The wolf in me is growling.
- Rox: Mine, too. I mean... You know what I mean.
- Braham: Believe me. I do.
- Rox: They're testing weapons here...on their captured prisoners.
- Braham: Is that...great Spirits, I know him!
After the cutscene:
- Lead Scientist Kostya: Bug off! I'm workin'. Too many buttons, pile of...
- Lead Scientist Kostya: Wait, intruders? Intruders! Finally, an interactive audience. (cackles)
Speaking to your allies after the tunnel section but before the prisoner section:
- Braham: I have to keep moving. If I stop for too long, I start thinking about what they've done to their captives here... The things I could do with that anger.
- Let's keep moving.
- Rox: I don't like this place... I smell the things that they did here. To the prisoners. Burning coals. Ugh, my stomach...
- I'm with you, Rox.
Approaching the weapons testing area:
- Lead Scientist Kostya: (laugh) New test subjects have arrived. Their timing is exquisite.
- Braham: Hey! You'll pay for this!
- Lead Scientist Kostya: It keens with outrage, the vermin. As if that will save it. As if! (snickers) Begin test now.
After the first weapons test is survived:
- Rox: The guts of the machine are behind those doors. Give it all you got!
During the Fire Tornado test
- Lead Scientist Kostya: Shuh, getting stuffy in here. How about some fresh air?
- Lead Scientist Kostya: Let me adjust the "kill" setting. There!
During the Crusher test:
- Lead Scientist Kostya: Uhh. Excuse me. (mumble) Crummy Flame Legion and its shoddy... Ah, here we go!
- Lead Scientist Kostya: They're survivors; I can relate. Until they're dead.
During the Fireball test:
- Lead Scientist Kostya: Gah, it's overheating! Outta my way, outta my—oh, that's supposed to happen. That's right! (laughs)
- Lead Scientist Kostya: Any time now, you clunky machine.
After all three weapon tests have been completed:
- Lead Scientist Kostya: This thermal core is crap! Where are my results? I want results! Fire EVERYTHING!
After the Thermal Core has been destroyed:
- Lead Scientist Kostya: They've ruined the tests. Ruined everything! GRAHH! I'll deal with them myself!
- Lead Scientist Kostya: Just give me, uhh, give me a moment. (mumble)
- Lead Scientist Kostya: Aha!
Once Lead Scientist Kostya has been defeated:
- Braham: That was a lot of weaponry.
- Rox: They sure packed for invasion. Probably going for the Black Citadel.
- Braham: Or Hoelbrak. Maybe both. We have to get out of here and warn them.
- Rox: Well, there's the exit. Let's go.
Approaching the cave holding the prisoners:
- Braham: I don't think this is the exit.
- Rox: No, but look. We found the prisoners. They're forcing them to mine!
- Braham: We have to get them out. I wouldn't wish mining on my worst enemy.
- Rox: Me, either. Let's go.
Speaking to your allies in the prison section:
- Rox: This is what we came for. Focus!
- I've got your back!
- Braham: Thank the Spirits, we found some of them alive.
- We'll get them out of here.
Freeing the first prisoner:
- Rox: Tribune Brimstone sent me to get you out. Report. What have you seen?
- Prisoner: Flame Legion, and lots of 'em, in full-on war mode. They've got dredge working with them. It's crazy.
- Rox: Okay, let's get out of here. One of us has to make it back to warn the citadel.
Checking fallen prisoners for the Molten Memorial Achievement:
- There's something inside the pocket of this prisoner's shirt.
- Take it.
- Leave the body alone. They've endured enough.
After defeating the Molten Alliance forces surrounding a prisoner:
- If prisoner is charr (one of the following):
- Prisoner: Let's get a move on. Some of us don't want to end up a fur carpet.
- Prisoner: Listen, the moles mentioned other bases. These mountains could be full of 'em!
- Prisoner: Did the legions send you?
- Prisoner: It's about time!
- Prisoner: We're not free yet.
- Prisoner: (grumble) No meat, no whiskey. What good are you?
- Prisoner: Hey, cutie, you looking for a new pet?
- If prisoner is norn (one of the following):
Freeing the sixth prisoner:
- Prisoner: Braham! They're all over these caves. We have to hurry. Everyone pick up a weapon!
- Braham: Are you okay?
- Prisoner: I can't think about that now. Let's just get out of here.
- Braham: Ottilia?
- Prisoner: Don't...don't ask me that. Not now. You and your friends just need to get us out.
- Braham: Okay.
After freeing all prisoners:
- Braham: That's the last of them. Now what?
- Rox: Now we get the flock out of here. Okay, everyone. We stick together, do you hear me? You're the sheep, and I'm the ram. Follow me.
- Braham: How come you get to be the ram?
- Rox: I've got the horns.
Speaking to your allies while escorting prisoners:
- Rox: Not on our watch, right? Let's show the Molten Alliance who they're dealing with.
- Let's do it.
- Braham: If only Eir could see me now...
- Let's take them down.
Approaching the boss platform:
- Rox: I admit, I didn't expect this. When I tell my tribune, he's going to think I've been dipping into his brandy.
- Braham: You don't have any of that on you, do you?
- Rox: Sorry, cub. This is not your lucky day.
Confronting the final bosses (in-game cutscene):
- Braham: Oh, we're so dead.
- Gigarg the Cruel: Squeeee! We've got company! Hey, bruiser. You see what I see?
- Rodion the Vile: (ROAR)
- Gigarg the Cruel: I'll take that as a yippee. Let's see how colorful a smear we can make.
After the cinematic:
- Braham: We can handle them! Spread out!
If Gigarg the Cruel is defeated first:
- Rodion the Vile: Gimme that pack. You fleas won't last long now!
If Rodion the Vile is defeated first:
- Gigarg the Cruel: Couldn't handle the gloves, huh? Let's try things my way: double the tech!
At the start of the second phase:
- Braham: You can do it! C'mon!
- Rox: I'll cover you! Go, go, go!
After defeating both bosses:
- Braham: Okay. Okay. That wasn't so bad. Where's the next one? I'm ready.
- Rox: Relax. We got them all, and I can't believe I'm saying this, but I saw explosives over there while we were fighting.
- Braham: Explosives?
- Rox: Rust my britches—yeah. Explosives. You all should blow this place up.
- Braham: What about you?
- Rox: Me? I'll be over there, by the door. Let's just say, explosives and me—we don't get along.
Approaching the facility exit:
- Rox: This door is locked! You're lucky I'm here. I picked locks on plenty of these dredge mechanisms back in my mining days.
- Braham: Great! The rest of you—if you're not setting charges, go wait by Rox. Otherwise, help me place these explosives around.
- Rox: FUH! Great. Explosives again.
Interacting with the Outflow Vent while carrying explosives:
- Outflow Vent: This Molten weapon will overheat if its vent is destroyed. Your explosives should do the trick.
- Plant explosives.
Interacting with the Outflow Vent while not carrying explosives:
- Outflow Vent: This Molten weapon will overheat if its vent is destroyed, but only a massive force can damage it.
- Leave.
Speaking to your allies while setting explosives:
- Rox: I'm not the one you want handling explosives, trust me. Explosives and I have a...messy history. Let Braham know when you're done and we'll hightail it back to the surface.
- Got it; no explosives for Rox.
- Braham: Time to blow all this mess sky high. Have we got all of the explosives set?
- Yeah! Let's get out of here! (Only if explosives have been set.)
- Give me a minute.
Escaping the facility:
- Rox: Got it! And not a moment too soon!
- Braham: Everyone out! I'll clear the path. Follow me!
- Rox: Trust me, We don't want to be here when it blows!
- Braham: Whole place is coming down!
- (one of the following)
- Prisoner: Rrraaagh!
- Prisoner: Move out! It's all coming down!
- Braham: You can do it! C'mon!
- Rox: Ignore the pain! Move!
- (one of the following)
- Prisoner: Boulders! Watch your step!
- Prisoner: Watch out—the cave's collapsing!
After the facility has collapsed:
- Braham: Is it suppertime yet?
- Rox: The Vigil thinks that was the last of the weapon caches. I have to get these prisoners back to the citadel.
- Braham: I'm going straight back to Hoelbrak with these others. I feel good but exhausted.
- Rox: And hungry.
- Braham: Yeah! So, if you're ever near Cragstead, you'd better stop by.
- Rox: If I come to Cragstead, it won't be to lounge around your hearth. It'll be to grab you for mission support.
- Braham: I'll keep my mace handy.
- Rox: You do that. I'll see you around, cub.
- Braham: Not if I see you first. (snort of laughter)
My story[edit]

|
|
