Weekly Strike Mission: Boneskinner
Weekly Strike Mission: Boneskinner
- Levels
- 80
- Type
- Strike Mission
- Zone
- Bjora Marches
(Shiverpeak Mountains) - API
- 1339, 1351
| Image(s) |
|
Click to enlarge. |
“One of Havroun Weibe's shamans, Hallveig, has reported that the Raven Sanctum has recently been taken over by the boneskinner. Raven Shaman Hallveig is looking for volunteers to enter the sanctum and cleanse it of this menace.
or
The fearsome boneskinner has taken over Raven Sanctum. Cleanse it of this menace.— In-game description
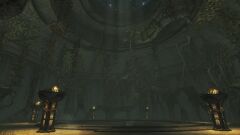
Weekly Strike Mission: Boneskinner is the fourth strike mission introduced into the game, taking place in Sanctum Arena.
Getting there[edit]
Players must own the Path of Fire expansion to join.
Players can select to join either a Public (only available when it is a Daily Strike Mission) or Squad (private) version of the instance. The Public version cannot start with less than 5 players and prevents new players from joining once the boss is engaged. The Squad version does not have the same restrictions but requires a raid-mode (10 player) squad to join.
- Public and squad versions
- Interact with the portal at the Raven Pass — in Bjora Marches (west of Jora's Keep Waypoint — ).
- Interact with the portal in Eye of the North ( Eye of the North Waypoint — ).
- Squad version only
- Enter or be within Eye of the North when the strike mission instance is opened.
Objectives[edit]
- Speak to the Raven shaman to begin the Strike Mission.
- Players in Strike Mission: x (if public)
- Draw Out the Boneskinner
- Defeat the boneskinner
- Boneskinner

- Strike Mission ends in: 10:00
- Silver rewards disappear in: 5:00
- Gold rewards disappear in: 3:00
- Strike Mission complete!
- Mission closes in 2:00
- Bonus rewards obtained: x/2
Rewards[edit]
- Once per day:
- Small Chest of Valor
- Medium Chest of Valor
- Large Chest of Valor
- The three chests above have the chance contain:
- Ancient Boreal Weapon Skin Container
- Each kill one bouncy chest. Rewards are scaled with the achieved rank.
- Misty Cape Scrap (If Prototype Harmonizing Mist Loom has been purchased.)
- Blue Prophet Shard (1-3)
- Piece of Unidentified Gear (2-3)
- Piece of Common Unidentified Gear (1-2)
- Piece of Rare Unidentified Gear
- Boneskinner Ritual Vial (3 if Silver, 9 if Gold, and rarely 30 for Gold)
- 35
 -45
-45 
- 2,000
 -4,000
  (Karma Rewards are affected by consumable boosters.)
 - 32,004 -48,006
- Possible rare rewards:
Walkthrough[edit]
This strike mission is the next progression after players complete the Shiverpeaks Pass, Voice of the Fallen and Claw of the Fallen and Fraenir of Jormag strike missions, which are collectively referred to by the community as the "IBS EZ3" strike missions. As with the Whisper of Jormag strike mission, this fight is significantly more difficult. These two encounters along with the EZ3 strike missions are collectively referred to as the "IBS Fast 5" strike missions due to their relatively quick completion speed compared to the Cold War and the Forging Steel strike missions.
General[edit]
This encounter has a lot more healing pressure and heavily punishes players that get hit by mechanics. It is thus recommended to have at least two dedicated healers and skills that help reposition downed players, such as "Search and Rescue!".
Players with the Essence of Resilience mastery can attack the nearby pylon to collect orbs to gain the Power of Resilience effect. This grants players the Spirit Nova special action key to deal significant damage to the boss and its defiance bar.
An orange-black field encircles the arena shortly after players near the center of the arena. Players standing on the field gain the Unrelenting Pain effect, which inflicts heavy damage every second.
Boneskinner[edit]
- Health: 20,979,420
- Enrage Timer: 10 minutes
- Enrage Effect: Defeats all players
- Fixation Mechanic: None
100% – 90%[edit]
Six torches surround the arena and are periodically extinguished by the boss. Players can interact with an unlit torch to relight it. The boss begins by extinguishing a torch and uses the following skills:
| Skill | Notes |
|---|---|
| Cascade | Launches cascading rectangular AoEs that rapidly deal medium damage. Players standing near the boss cannot be hit by this attack. |
| Death Wind | Spews a noxious cloud in a cone that extinguishes torches and inflicts Knockdown and Weakness. |
| Grasp | Raises its right leg and spawns AoEs below all players that persist for a while, inflicting Torment on the initial hit then pulsing damage and Weakness. Players should ideally stack together tightly to stack together the AoEs, then move slightly clockwise or counterclockwise to position the next set. |
| Unnatural Aura | Pulses low damage every three seconds. |
| Tormenting Aura | Pulses every second if a torch is unlit, with damage increasing per stacks of Tormenting Aura on players. This starts out as a small, orange-black AoE around the boss that expands for each extinguished torch.
|
Although the intended strategy is to have designated players relight the extinguished torches, the most common strategy is to have all players stacked together near the boss and outheal the damage with dedicated healers. However, the general process is the same for both strategies aside from how the torches are dealt with.
Players attempting the Hold onto the Light achievement will find it easier with the second strategy. Because the group will allow all torches to be eventually extinguished by the Boneskinner, the wisps will be unable to extinguish them. Players should allow all torches to be extinguished by the boss before reaching 85% health, then continue the fight as normal.
This phase follows a fixed, repeating pattern: Death Wind → Grasp → Cascade → Grasp → Cascade
90% – 75%[edit]
At 90% health and about every 35 seconds (can be delayed if other skills are prioritized), it will stand on its hindlegs, unlock its defiance bar, and summon Veteran Aberrant Wisps. Breaking the bar inflicts Stun and Exposed to the boss; failing it has no effect. Wisp attacks can be negated with projectile-related skills, such as projectile destruction and reflects.
Players with the Power of Resilience effect will gain access to the Spirit Nova special action skill to deal large damage to the bar and enemies. Hitting the wisps will generally unlock this skill, allowing players to massively increase their damage through multiple uses of this skill.
This phase follows a fixed, repeating pattern: Death Wind → Grasp → Cascade → Grasp → Cascade
75% – 0%[edit]
At 75% and every 25% health, the boss will use the following skills:
| Skill | Notes |
|---|---|
| Charge → Crushing Cruelty |
Charges towards and permanently destroys a torch, then leaps to the center inflicting heavy damage. Players should position away from the targeted torch and evade the leap attack. |
| Douse in Darkness | Jumps out of the arena and Pulls all enemies into the center and extinguishes all torches. Leaps back to the center after a delay and deals heavy damage. Players should evade the leap attack. |
The timing for these skills may be delayed if other skills are prioritized. The pattern for this phase is less fixed, however the boss will generally alternate between Death Wind and Grasp, and cast Death Wind after leaping.
NPCs[edit]
Allies[edit]
Foes[edit]
Objects[edit]
Dialogue[edit]
- Raven Shaman Hallveig: Thanks for the assistance, Commander. Is your squad ready to go?
- If public:
- (Advancing will lock your party and prevent any other players from joining the Strike Mission.)
- Let's do this.
- We're still waiting for more people to show up.
- If fewer than 10 players
- Raven Shaman Hallveig: Could still use more bodies. You sure you're ready?
- (You have fewer players than recommended for this Strike Mission. Choose to go forward anyway, or wait for more help.)
- We're ready.
- Your party has been locked.
- No new players will be able to join the Strike Mission. Work with your party to complete the goal!
- We'll wait for more help.
- Interacting with the gate
- Raven Shaman Hallveig: Do you want to return to Bjora Marches?
- Yes.
- No.
Related achievements[edit]
 Whisper in the Dark: Legendary Boneskinner — Kill the boneskinner in the Sanctum Arena. (10)
 Return to Whisper in the Dark: (Bonus) Strike Back: Raven Sanctum — Defeat a legendary creature in the Raven Sanctum. (0
 )
) Daily Icebrood Saga: Daily Legendary Hunter — Defeat a legendary creature in the Raven Sanctum. (0
 )
) Shadow in the Ice: Deathless Hunt — Defeat the Boneskinner in the Sanctum Arena without being downed or defeated. (5
 )
) Shadow in the Ice: Flickering Light — Light 30 torches while fighting the Boneskinner in the Raven Sanctum. (5
 )
) Shadow in the Ice: Hold onto the Light — Complete the Boneskinner Strike Mission without letting any torches be extinguished by wisps. (10
 )
)
Version history[edit]
| Patch | Changes |
|---|---|
| February 27, 2024 |
|
| February 28, 2022 | End of Dragons release:
|
| April 27, 2021 |
|
| August 11, 2020 |
|
| March 17, 2020 |
|
| January 30, 2020 |
|
| January 29, 2020 |
|
| December 05, 2019 |
|
| November 21, 2019 |
|
| November 19, 2019 |
|
Trivia[edit]
- Shrines to Wolverine, as well as several bodies of deceased Vigil members, can be found within the arena.
- Prior to the February 28, 2022 game update, the strike mission rewarded shards depending on the weekly Emissary:
- Blue Prophet Shard (1-3)
- Green Prophet Shard (1-3)
- Red Prophet Shard (1-3)


