Rapids/Tribulation Mode
Rapids
Tribulation Mode

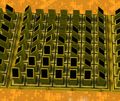
Map of Rapids
Tribulation Mode
- Tier
- World 2 Zone 1 Tribulation Mode
- Type
- Area
- Dungeon
- Super Adventure Box
- Connects to
- World 2 House, Pain Cliffs, Hub
| Image(s) |
|
Click to enlarge. |

Rapids, or World 2 Zone 1, is the fourth level of Super Adventure Box. It contains 11 Hidden Rooms, 4 Shops, 2 Furniture Shops, 2 locked chests, 13 dig spots, and 38 baubles to collect.
Objectives[edit]
 Super Adventure Box
- Team Score: X (refers to the number of foes killed)
- Finished!
- Warping in: 0:15
Tribulation Mechanics[edit]
A high-level overview of the hazards in this zone:
- Barrel: contains nothing and will instantly kill players who get too close to them.
- Flower Bomb: static flowers will detonate when players get too close, resulting in instant death. Flowers will not respawn.
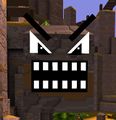
- Helping Hand: some will turn into Hand Missiles that will fire at players, resulting in instant death.
- Jumping Rock: some boulders will jump into the air and knock back players, but there is a short delay between attacks during which they can be used as a platform.
- No Cloud: these clouds will electrify themselves after a few seconds.
- Spears: like Spikes, but invisible until players get close. They can sprout from walls as well as the ground. Spears stay visible after first activation.
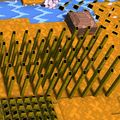
- Spikes: touching these will result in instant death.
- Tribulation Cloud: these clouds will follow a player shooting electricity and creating large AOE fields if you get too close.
Additionally, there are a few non-lethal mechanics:
- Balloon Pump: can be interacted with to acquire a Balloon.
- Cloud Flag: using a Balloon's Unlock skill next to it will turn it into a checkpoint. Unlocking the cloud flags is not required to complete the zone.
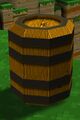
Barrel
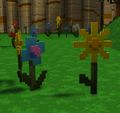
Flower Bomb

Helping Hand Missile
Jumping Rock

No Cloud
Spears (World 2)
Spikes (World 2)

Tribulation Cloud
.jpg)


.jpg)
.jpg)


Balloon Pump

Balloon

Cloud Flag


Walkthrough[edit]
- For Exploration and Normal Mode, see: Rapids
| Search YouTube for videos related to World 2 Zone 1 Tribulation Mode. |
This walkthrough details the path through the zone in tribulation mode in addition to the locations of all shops needed for the Tough Customer, World 2 achievement, and the Stump needed for the Woodpecker achievement.
Start to Checkpoint 1[edit]
You are surrounded with spikes, and most of the area around the spikes has spear traps. First you need to follow the larger river. There are two options:
- Jump over the spikes toward the large river and cross it by running and dodging, then cross back again on the other side of the tree; or
- Turn around and jump over the spikes to the left part of the cliff ledge. Turn right and jump along the very edge, clockwise around the spikes and spears, toward the smaller river. Head towards the Shopkeeper, avoiding a big jumping rock before him. Cross the river along the three white platforms in front of the Shopkeeper. Be careful of the exploding flowers on the other side.
Walk along the bank of the larger river toward the mountains and turn left into a ravine. When you come out, there is a turtle to your right. Jump onto the big rock among the spikes. Cross the small wooden bridge diagonally by jumping on the corner poles and then over the spikes. A hand missile will shoot at you at the bridge, but you can avoid it if you keep moving.
Climb onto the higher ground in front of you, between the cliffs. Two small jumping rocks near the edge will try push you back into the spikes. Toward the large waterfalls you'll come to another small jumping rock and a rocky pillar. Climb on top of the pillar. Jump onto the ledges, back towards the small river. The other side of the small waterfall has a partially hidden large jumping rock. Jump across the waterfall and dodge immediately when landing, to avoid the rock pushing you down.
Walk up the wooden bridge. There is a spear trap at the helping hand and to the direction it's pointing, so use the wooden pole to jump over it into the archway. There are more spears right after the archway. Jump along the outcroppings across the waterfall and climb up to Checkpoint #1.
Checkpoint 1 to Checkpoint 2[edit]
Proceed as usual across the alligators, turtles, and rocks, up the lower river. When climbing the ledges to the upper river, there is a small, partially hidden jumping rock near the first turtle. You can dodge the rock's slam or hit the turtle with a ranged weapon. The last small rock in the upper river is another jumping rock, which you can move quickly over, or avoid by jumping to the large rock on the left side of the river. As you cross the next bridge to the top of a pillar, the bauble and the front left post are covered in spears, so move along the other posts and the outside edge. Continue across the bridges to the checkpoint.
Checkpoint 2 to Checkpoint 3[edit]
This section is the same as in normal mode, except for a spear trap at the end of the sloped bridge. Continue across the rocks, alligators, and turtles around the bend of the river, then up the ledges on the left, and jump across the river. Move back downstream and around the stone pillar, and climb on top of it. Jump back across the river. Before reaching the top of the wooden bridge, jump off to the right towards the checkpoint to avoid the spears.
Checkpoint 3 to Checkpoint 4[edit]
This section is the same as in normal mode. Proceed across the bridge and jump down to the raft.
Checkpoint 4 to Checkpoint 5[edit]
This section is the same as in normal mode as well. Ride the raft down the river.
Checkpoint 5 to Checkpoint 6[edit]
The area in front of the flower launcher and next to it is covered in spears. To avoid them, walk out to the grass, then towards the big rock at the edge of the ravine, and back along the edge of the river bank to the flower launcher. Before taking the flower launcher, shoot at the alligator to stun it, as the flower launcher will launch you on top of it. On the other side of the river, back towards the checkpoint you can visit ![]() Tough Customer Shop #2 (After a Wild Ride).
Tough Customer Shop #2 (After a Wild Ride).
From the alligator, take the second flower launcher across the ravine. You can walk around the left side of the spikes and burn the dry pine trees to get through. As you continue up the river and approach the toad, a helping hand missile will launch at you from above the toad, and another one will launch at you from the far wall as you reach the alligator. Then you can continue across the rocks in the river to the next checkpoint.
Checkpoint 6 to Checkpoint 7[edit]
This section is the same as in normal mode, except for a small jumping rock along the final stretch of the river.
Checkpoint 7 to Cloud save 1[edit]
For the Woodpecker achievement, you can proceed ahead and to the right between the two trees to the maze and the ![]() Stump as usual.
Stump as usual.
There are spikes blocking the large river with the logs, so you will have to go through the hillbilly cave below to cross. Walk straight from the checkpoint to the cliff. You can drop to a ledge just below the edge at the point where the cliff cuts inward, just to the right of the tree. The Balloon Pump is on that ledge. Drop down to the left toward the river, and continue up the rocks in the river to a bouncing mushroom. The Cloud Flag is on the ledge above it.
Cloud save 1 to Checkpoint 8[edit]
Open the Hillbilly cave by throwing a bomb at the pile of rocks in the wall. Pass through the Hillbilly Cave as usual to reach a bear on the other side of the river. From here you can cross the river to Tough Customer shop #4, or return for it later using flower launchers at the final checkpoint.
Continue down the left side of the river on rocks or logs to find a Tribulation Cloud in front of the Hillbillies and ![]() Tough Customer Shop #3 (Across the wide river). The area behind the hillbillies is covered in spikes, so jump up to the ledge to the left of the shop, then walk clockwise around the rock face to reach the checkpoint.
Tough Customer Shop #3 (Across the wide river). The area behind the hillbillies is covered in spikes, so jump up to the ledge to the left of the shop, then walk clockwise around the rock face to reach the checkpoint.
Checkpoint 8 to Cloud save 2[edit]
After the Dry Pines and the bear, go to the right path past the oozes to find the Balloon Pump. There are spikes blocking the left path, but there is a sliver of space along the left edge of the cliff, where the grass is raised just past the sunken grass. You can jump to it and jump past the dry pine if you land so that your character's feet mostly hanging off the cliff. Continuing around the edge of the cliff, there are spikes just past the dark rocks you jump over, so stay close to the edge and jump across the gap next to the hanging bouncing mushroom to bypass them.
If you wish to drop the bouncing mushroom, if you die, you can go to that bouncing mushroom instead of doing the jump to the sliver of land to avoid the spikes. There are spikes along the wall on the grassy ledge below those spikes, so stay close to the edge as you continue along the cliff. As you jump up the rock pillar to the bouncing mushroom, there are spikes between the pillar and the wall that can reach the lowest rock on the pillar, so stay closer to the cliff side when you jump up to the second rock.
Climb the cliff using the rocks and bouncing mushrooms as usual, watching for a helping hand missile on the waterfall just under the top ledge, to find Cloud Save 2.
Cloud Save 2 to Checkpoint 9[edit]
For ![]() Tough Customer Shop #1 (Behind a gigantic waterfall), stand on the right side of the log and bomb the wall when it comes even with the first grassy ledge on the cliff. You can use /gg to return to the top.
Tough Customer Shop #1 (Behind a gigantic waterfall), stand on the right side of the log and bomb the wall when it comes even with the first grassy ledge on the cliff. You can use /gg to return to the top.
When crossing the river, there are spikes on the grassy ledge after the second log. If you go fast, you can jump over it to reach the third log and continue to the checkpoint.
If you reach the last log when it is too low to reach the checkpoint, you can stand on the left end of the last log to enter the cave of bears, aiming for the raised patch of grass to avoid spikes on the bottom level of the floor. Then work your way up to the checkpoint and a chest.
Checkpoint 9 to Boss[edit]
The boss fight is the same as normal mode.
The fourth shop for Tough Customer obtainable in this map can be accessed any point after Cloud Save 1. You need to traverse backwards across the rapids which can be accessed right before shop #3. Returning to this area after right gaining checkpoint 8 is tricky but easy with Flower Launchers above checkpoint 9. Near the edge there is a single water spout. Use this to jump to the ledge. Follow the ledges down to the bauble and then continue left and up the cliff. From here use the bouncing pads and flower launchers to reach ![]() Tough Customer Shop #4 (Overlooking the wide river).
Tough Customer Shop #4 (Overlooking the wide river).
Achievements[edit]
- For Normal Mode achievements, see: Rapids#Achievements
| Connoisseur of Pain | Super Adventure Box: Tribulation Mode | 75 |
|---|---|---|
| Complete Zone 1, Zone 2, and Zone 3 in World 2 in Tribulation Mode.When will it end? |
1 Zone Completed in World 2 in Tribulation Mode | 25 |
| 2 Zones Completed in World 2 in Tribulation Mode | 25 | |
| 3 Zones Completed in World 2 in Tribulation Mode | 25 |
| Tough Customer, World 2 | Super Adventure Box: Tribulation Mode | 25 | |||||||||||||||||
|---|---|---|---|---|---|---|---|---|---|---|---|---|---|---|---|---|---|---|---|
| Visit every World 2 shop in Tribulation Mode.You keep these merchants in business. |
1 Shop Visited in World 2 Tribulation Mode | 2 | |||||||||||||||||
| 2 Shops Visited in World 2 Tribulation Mode | 2 | ||||||||||||||||||
| 3 Shops Visited in World 2 Tribulation Mode | 2 | ||||||||||||||||||
| 4 Shops Visited in World 2 Tribulation Mode | 2 | ||||||||||||||||||
| |||||||||||||||||||
| Woodpecker | Super Adventure Box: Tribulation Mode | 30 |
|---|---|---|
| Destroy all tree stumps in World 2 Tribulation Mode.Take down the kingpin. |
1 Tree Stump Destroyed in World 2 Tribulation Mode | 10 |
| 2 Tree Stumps Destroyed in World 2 Tribulation Mode | 10 | |
| 3 Tree Stumps Destroyed in World 2 Tribulation Mode | 10 |
Bauble (1 ![]() • 5
• 5 ![]() • 10
• 10 ![]() • 20
• 20 ![]() • 50
• 50 ![]() ) •
) • ![]() Bauble Bubble
Bauble Bubble
Continue Coin • Infinite Continue Coin • ![]() Fancy Furniture Coin
Fancy Furniture Coin
| Skills and Upgrades |
• Purse
|
|---|---|
| Hub | World 1 House • World 2 House • World 3 House • World 4 House |
| World 1 | Z1: Sunny Glade (TM) • Z2: Dark Woods (TM) • Z3: Kingdom of Fungus (TM) • B: Cart |
| World 2 | Z1: Rapids (TM) • Z2: Pain Cliffs (TM) • Z3: Storm Top (TM) • B: Robbers |
| World 3 | Z0: Test Zone • Historical: Sparkling Pools |
| Adventures | Super Adventure Hub Super Adventure 1-1 • Super Adventure 1-2 • Super Adventure 1-3 Super Adventure 2-1 • Super Adventure 2-2 • Super Adventure 2-3 Super Adventure Test Zone |
| Achievements |